SOMETHING I...

CookedMadeFilmedLoveFoundLearnedWrote

PIE OF THE WEEK

Monday, November 22, 2010

Dairy- & Gluten-free Pine Nut Pie

Unbaked pie - bakes into a pretty, marbly surface!

I know that last week I wrote on my Pine Nut Pie recipe and that this week - if anyone was paying attention to the Pie of the Week widget off to the right - I was supposed to write on a made-up recipe for Banana Nutella, but to be honest, my Banana Nutella Pie did not turn out as well as I had hoped whilst my Pine Nut Pie seems to be improving!

This last week I made it for the birthday celebration of Paul Hoppe and then again for the in-laws, some of who cannot eat wheat and/or dairy. I learned some things and made improvements to my recipe, including a version that would not offend the stomachs of my loved ones!

Original ingredients:
Danica's Pine Nute Pie Ingredients
(click here for the original recipe)

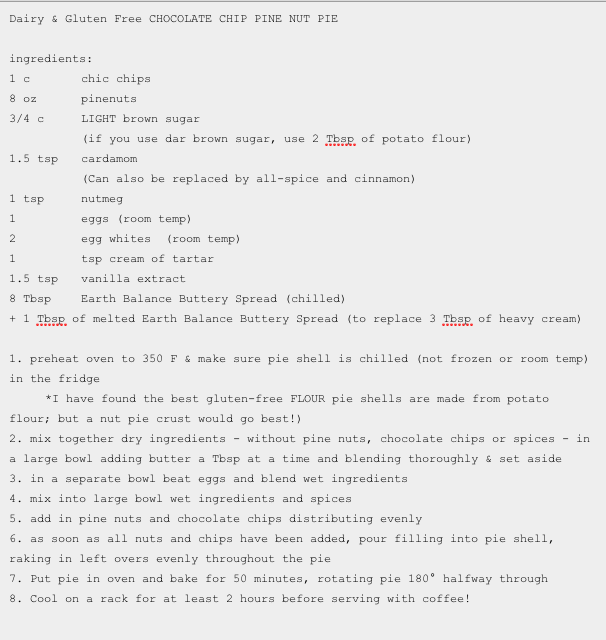
Dairy & Gluten Free CHOCOLATE CHIP PINE NUT PIE  ingredients: 1 c 		chic chips 8 oz		pinenuts 3/4 c 	LIGHT brown sugar 		(if you use dar brown sugar, use 2 Tbsp of potato flour) 1.5 tsp 	cardamom 		(Can also be replaced by all-spice and cinnamon) 1 tsp 	nutmeg 1 		eggs (room temp) 2 		egg whites  (room temp) 1 		tsp cream of tartar 1.5 tsp 	vanilla extract 8 Tbsp	Earth Balance Buttery Spread (chilled) + 1 Tbsp of melted Earth Balance Buttery Spread (to replace 3 Tbsp of heavy cream)  1. preheat oven to 350 F & make sure pie shell is chilled (not frozen or room temp) in the fridge 	*I have found the best gluten-free FLOUR pie shells are made from potato flour; but a nut pie crust would go best!) 2. mix together dry ingredients - without pine nuts, chocolate chips or spices - in a large bowl adding butter a Tbsp at a time and blending thoroughly & set aside 3. in a separate bowl beat eggs and blend wet ingredients  4. mix into large bowl wet ingredients and spices 5. add in pine nuts and chocolate chips distributing evenly 6. as soon as all nuts and chips have been added, pour filling into pie shell, raking in left overs evenly throughout the pie 7. Put pie in oven and bake for 50 minutes, rotating pie 180° halfway through 8. Cool on a rack for at least 2 hours before serving with coffee!

What I learned the second and third time around:
  • Istead of dark brown sugar, light brown sugar! This lends itself to a more fluffy filling and doesn't get quite as dense.
  • The flour is only necessary if you want to use dark brown sugar which mixes into a syrup that is thicker than the light brown sugar.
  • Earth Balance Natural Buttery Spread bakes very well with pies! I hardly noticed the difference between it and regular butter.
  • On a similar note, this spread has a higher viscosity than butter when melted and is similar to the heavy cream - 1 Tbsp of this for the missing consistency of 3 Tbsp of heavy cream
  • The best alternatives for gluten-free pie crusts are not potato flour ones, but cornmeal and nut based! This is Almond Tart Dough is vegan and wheat-free.
  • Trader Joe's new press-in pie crusts are AWESOME. (Not Vegan/Vegetarian/Gluten-free)

Friday, November 19, 2010

I love Mumford & Sons.

For a long time I have been trying to figure out how to post about Mumford & Sons. I didn't want to merely refer to them or provide only a simple sound clip. When Ashley came to visit for a few weeks from Indonesia, she brought with her this wonderful band. Matt and I have been listening to it almost nonstop since making the deliberate decision to patronize the band!

And now, from a friend of my friend's blog, I have found a take-away-show style video of our favorite song:


I know that lines from their music have been posted as facebook statuses for sometime now, and that many a blog has pondered on their religious affiliation. I am by no means a music critic (or any kind of critic, beyond boisterous, opinionated mediterranean-style family exchanges!), but Mumford & Sons does some wonderful things with their lyrics - in conjunction with some wonderful wailings on their stringed instruments - that warrant some meditation. Below are the lyrics to the song above:

How fickle my heart
and how woozy my eyes
I struggle to find
any truth in your lies
And now my heart stumbles
on things I don't know
This weakness I feel
I must finally show

Lend me your hand
and we'll conquer them all
But lend me your heart
and I'll just let you fall
Lend me your eyes
I can change what you see
But your soul you must keep,
totally free

In these bodies we will live,
in these bodies we will die
Where you invest your love,
you invest your life

Awake my soul, awake my soul
You were made to meet your maker

Tuesday, November 16, 2010

Chocolate Chip Pine Nut Pie AND How to Build a Pie (I)

I have been hesitant to try this pie... I know what pinenuts (pignoli s) taste like - and I know I like them - but once again I find myself asking, in a pie? I'd never heard of it except as one of the recipes listed in my Pie book. But this book has since gone over-due and was returned to the library this week, leaving me recipe-less. I did make a copy of the recipe... but heck if I can find it.

So here's the thing, I think I'm pretty clever, this is my 6th pie, I decided to take a gamble and make up the recipe using the experience I've gained, so far. It turned out SO well, I made it twice!

CHOCOLATE CHIP PINE NUT PIE  ingredients: 1 c 		chic chips 8 oz		pinenuts 3/4 c 	dark brown sugar 2 Tbsp 	sugar 1.5 tsp 	cardamom 1 tsp 	nutmeg 3 Tbsp 	heavy whipping cream 1 		eggs (room temp) 2 		egg whites  (room temp) 1 		tsp cream of tartar 1.5 tsp 	vanilla extract 8 Tbsp	butter (room temp)  1. preheat oven to 350 F & make sure pie shell is chilled (not frozen or room temp) in the fridge 2. mix together dry ingredients - without pine nuts, chocolate chips or spices - in a large bowl adding butter a Tbsp at a time and blending thoroughly & set aside 3. in a separate bowl beat eggs and blend wet ingredients  4. mix into large bowl wet ingredients and spices 5. add in pine nuts and chocolate chips distributing evenly 6. as soon as all nuts and chips have been added, pour filling into pie shell, raking in left overs evenly throughout the pie 7. Put pie in oven and bake for 50 minutes, rotating pie 180° halfway through 8. Cool on a rack for at least 2 hours before serving with coffee!

I started by picking out my filling and measuring out the basic ingredients to get an idea of much would make the desired amount of filling. I then went on to experiment with to iterations of the pine nut pie! Below is what I learned based on a little research and experience - but please feel free to contribute or correct me if I'm wrong.

MAIN INGREDIENT:
With pies utilizing squash and fruit as the primary filling, it seemed between 1 1/2 - 2 cups of the primary ingredient is needed, then pureed or mixed with other things. I had to determine whether or not to blend the pignolis/pinenuts with something else or treat them like the "fruit" - since pine nuts are so soft, even when toasted, despite their strong flavor, I decided they were fine as the main ingredient rather than the main flavor within some other base (i.e. ginger flavor in the custard pie). I had an 8 oz bag of pinenuts which measured closely to 1 1/2 cups. I toasted them on a cookie sheet in the broiler on low for about 6 minutes and then watched to they reached the right "brown-ness".

To turn the nuts into a cream filling, I then considered which dry and wet ingredients to use.

WET INGREDIENTS:
I have basically only used two kinds of liquid in most of my pies: cream and eggs. I love cream, I will use it whenever I can. I am also a proponent for using it and whole milk rather than "low fat" alternatives and a quarter cup of heavy or light cream can go a long way to create thick, but fluid wet ingredient base. Egg thickens when cooked and mixes well at room temperature; but whole eggs can get quite dense, so consider using just egg whites or a mixture of the two (I used whites in the first iteration of the pie and just whole eggs in the second - it was too dense with the 2 yolks).
Other wet ingredients to consider: For many fruits, the addition of lemon is warranted; for many squash/winter pies, the addition of honey or molasses; and for yet many other kinds of pies and their saucy garnishes, corn syrup (but I'll let you in on a hint, most of the time you don't need it, BUT if you don't use it you will need to replace it with something of similar viscosity - like honey or an amount of water with boiled sugar).

DRY INGREDIENTS:
Most of my favorite pies use between 1/2 to 1 1/2 cups of brown sugar to enhance the fruit; in the case of the cream-based pies, similar amounts of white sugar are used BUT often times if you've got good hardy filling (like several cups of a fruit or squash) you really don't need more than 1/2 a cup of sugar. You can also replace it with things like honey or chocolate chips - instead of an extra half a cup of sugar in the pine nut pie, I added chocolate chips!
Two tablespoons of flour goes a long way with giving your pie some density, but if you are trying to create a filling that is not so fruity and not so custardy - like a peanut butter filling - you are going to need closer to a cup of flour. You will also want to consider how you would lighten a dense, flour-based filling. I often use a teaspoon or two of cream of tartar (NOT to be confused with tartar sauce... which I once sent my husband to the store to get in a last minute pie baking frenzy...) - it has a similar effect as baking soda, especially in addition to egg whites.

BUTTER:
I don't know if this belongs with wet or dry because it ought always to be added at room temperature which makes it sweat a bit. Generally you need 1/4 - 1/2 a cup in any given recipe (not including the crust) unless you venture away from the fruity/squashy/savory fillings, which call for more, and lean toward the sugary/custardy/creamy/sweet fillings, which call for less.


SPICES:
My favorites in pie: nutmeg, ginger, and, lately, cardamom! You usually don't need more than a teaspoon of any given spice, but I tend to like my baked goods robust so I generally add an extra dash or two. These are some other good pastry spices I selected from descriptions at realsimple.com:

Cinnamon, ground. Use this warm, aromatic spice for holiday baking, as well as stews and curries.
Cloves, ground. A staple in holiday baking, especially gingersnaps.
Ginger, ground. Ground ginger has a more intense and astringent taste than fresh and is often more convenient. Ginger’s popularity has increased in the U.S. because of its supposed benefits to the digestive system.
Nutmeg, whole. Nutmeg's sweet, spicy flavor is great in savory and sweet dishes alike.
Allspice, whole. Tasting like a combination of cinnamon, nutmeg, and cloves, this aromatic spice will complement both sweet and savory meals (particularly jerk dishes).
Chinese five-spice powder. Comprised of cinnamon, cloves, fennel, star anise, and Szechuan pepper, this powder is a staple in Chinese fare.
Star anise. A Chinese spice, star anise resembles a star shape. Ground, it’s the main ingredient in Chinese five-spice powder.
Vanilla beans. Beans should be dark, smooth (not dry), and plump. Store in an airtight container in the freezer for up to a year and a half.
Cardamom, ground. Use in Indian dishes and some baked goods. It should look dark gray.
Caraway seeds. Give breads and cakes an earthy, nutty flavor.


Wednesday, November 10, 2010

I learned to make Japanese water balloons!

A few weeks ago, Ashley put up a series of lovely blog posts what engendered great feelings of whimsy in me. One of the things she mentioned was sending a birthday package to a friend (I would venture to guess it went to mutual friend currently featured in Ashley's blog) that had a bag, with instructions, full of folded origami balloons. I decided I must learn this for myself! And then put these little balloons in an emergency party kit a long with some other goodies (mentioned below) - you can, too! With these step by step photos, I did my darnedest to depict how pictorial instructions for you (mouse over the image for step instructions):


At the same time as discovering Ashley's balloons, Hollin visited and photographed the 6th Annual Puces Pop DIY Craft & Fair where equal amounts of celebratory decor dotted the church's basement and merchandising displays of crafters' booths. A particularly lovely and simple decoration Hollin captured were the pom-poms strung up above the entrance:


Apparently, though, you can purchase something similar for $65 from anthropologie (while these pom-poms are felted, they do NOT make this project worth that hunk of change in my humble opinion):


I finally got myself to Michael's where I was able to purchase a HUGE bag of brightly colored pom-poms for $5 and string them together myself with some magenta embroidery floss - it was very therapeutic:


(Yes. Our hallway is pink.)

Sunday, November 7, 2010

Ginger Custard Pie (with Mocha Sauce)


This was my first custard pie. If you've never made custard or pondered the ingredients, custard is essentially all kinds of cream heated (perhaps with the addition of sugar) and then allowed to cool into a pudding - it just might be humankind's greatest invention.

But in a pie? Well... I have to admit that while everyone agreed this pie was super tasty, it just didn't do it for me last night. I mean, the ginger is a wonderful flavor! It's feels so very autumnal and has the wonderful properties spicy-ness and a hint of the savory umami quality - it can be sweetened and soured and add subtly to a traditionally not-so-spicy dish like my butternut squash apple soup. But all by its lonesome, I'm not so sure I like it. (Although everyone else really loved that their lesser experiences with ginger were swayed by the creamy toning down of the flavor they often found overwhelming!)

Ultimately, I have decided that my disappointment in this pie really comes down to my expectations in texture being failed. The last three pies I've made have been dense and filled with with the fruit of trees or squash. This one was so light and fluffy, after all, it only had a handful of ingredients and most of them were milk products. But I also didn't refrigerate it overnight as is often done with custards.

I think I also may have simply been in the mood for more spices - not just ginger (although this is my favorite spice of all!).

All in all, the pie turned out splendidly, and if you are in the mood for something light and fluffy and less appropriate for dessert AND THEN the next four meals (which is what happens in this household when we don't have friends around to help taste test our pie!)

The best part by far, however, was the absolutely sinful mocha drizzle - cocoa and ginger are the combination of all time! And I suppose it did help that the mocha glaze was essentially espresso grounds in butter/heavy-cream/chocolate chips in this ratio 1:4:4. I just can't keep my fingers out of it!!!! I gave half to our neighbors eat or burn to just make sure we all keep our arteries in tact at the Sheean house.


Thursday, November 4, 2010

The first thing I ever filmed.

I used to be a performing arts geek. I loved being on the stage for band, choir and the annual high school musicals - but when I broke up with my boyfriend my senior year (who was involved with most of these things and, thus, had lots of friends in the same classes as me) I had a really hard time losing myself in these interests with his and his kind involved at equally intimate levels.

Luckily, I had tricked my parents into signing a form that emancipated me in the eyes of the public school system! I spent a lot of time ditching those classes for "dentist appointments" and "family issues." Then, one day, I found an unassuming, unencumbered, and secretly compassionate teacher in detached classroom on a part of the campus I had never, ever visited. As it turns out, our high school had a video production program, and he was the king of it! I don't know if I started to go to the classroom after I was asked to perform in one of his students' videos or after I realized my choir period was his prep period and he didn't care if ditched in the video studio - but in case it was love at first sight.

WITH VIDEO!!
(Uuugghh, did you think I was talking about a student-teacher affair!? Gross. Not cool. Shame on you.)

Anyway, at the end of the fall semester I switched into one of the video classes and played catch up with more zeal than I had ever known myself to have. I plotted and practiced and story-boarded and shot and re-shot until I was satisfied with this - the very first video I ever ever ever wrote or shot or edited or produced:

Monday, November 1, 2010

Honey Pumpkin Date with 'Mallow Topping


In a nutshell:
1) Thoroughly blend all the ingredients together, taking care that the dates are cut to bite-sized bits.
2) Pour into your prebaked graham cracker pie crust, distributing date pieces evenly
3) Bake at 350 F for 20 min, rotate pie, bake for 25 more min at 450 F
4) Remove, let cool, place in the refrigerator for at least 3 hours
just before serving,
5) cover chilled pie with mini-marshmallows and place in the broiler for 2-3 minutes -
MAKE SURE YOU WATCH THE MARSHMALLOWS AS THEY BROWN!! If you take your eyes off for even a few seconds, you'll end up with an ugly burnt mess.


Pumpkin, dates, eggs, heavy whipping cream, full-fat sour cream,
honey, molasses, cinnemon, ginger, nutmeg, and cloves!

One thing I am learning about pies is that for all their variety in flavor, filling, crust and occasion, they are pretty darn straight forward to make.
However, one thing I underestimated is the value of some TLC. This pie, relatively simple and easy in writing, required a significantly greater amount of time to prepare (and practice). And I am a lazy person - if I had planned a little better, I might have been a little less frustrated, but perhaps you can benefit from my strife and discovery:

Stuff I learned this time around:

1) Let ingredients (like eggs) reach room temperature
2) Your own squash puree is easy! But not instantaneous...
3) Cool a pre-baked pie shell in the fridge OR unthaw a frozen one in the fridge before using
4) If the recipe says the pie should cool -
MAKE SURE YOU HAVE TIME TO LET THE PIE COOL!

A little about each:

1) Letting the ingredients, like eggs & butter & even milk, really does help mix and bake the filling to the proper consistency!
Room temperature ingredients allow for the emulsion of fat and liquid which cannot otherwise mix. If you add cold ingredients, like eggs from the fridge, to a room temperature filling, you may end up with not-so-yummy descriptions of your mixture like curdled, chunky or grainy. This is particularly annoying if you are mixing or whisking by hand.
Also, your mixture will likely not hold its form as well - a good looking pie is even across the surface and not cracked or sunken. Sinking is a particularly disheartening result of chilled ingredients.
(PS I know the FDA says this isn't true, but you can leave eggs out of the refrigerator for up to two weeks, depending on how fresh they are. It's true! That's how they do it in EVERY OTHER COUNTRY except America. Ask you European or African friends (I did). There isn't an in-between for a good egg and a rotten one and so long as you aren't storing your eggs in the top cabinet with the California winter-heat beating on them, they'll do just for for a while.)

2) You can cook any squash like this:
Cut in half, de-seed, put in the oven in a half an inch of water (any way you like) with some loose foil over for about 35-40 minutes at 350 F. That's it. Pumpkin, Delicata, Spaghetti, they can ALL be cooked this way. If you want to forgo the canned pureed squash you stick the results (without skin!) in a blender. VIOLA!

3) Once again, don't be lazy like me. Prebaked pie shells are the bomb! And easy. So just do it, you don't need to always buy pie shells... but you do need to cool them and not use them straight from the oven. If you do, you might make a mess of your pie in one or several of theses ways: cooking the outside filling faster on the hot crust, crust can absorb the filling and get mushy, the taste might change, the exposed edges will likely cook more & dry out than the covered ones and ultimately, the crust (depending on the kind) can really lose its shape - refrigerating it keeps it firm.

4) This is probably the singularly most important experience I had during the baking of this pie.
The filling for this pie used a lot of liquids and had a very low viscosity (rather runny); in addition to this new factor in pie-making, the recipe called for this pie to be baked at two different temperatures in the first half and last half of its time in the oven. I did my best to follow the recipe to the "T" (after not doing so and creating delays as I ran into the aforementioned discoveries) and baked as instructed. But at the end of the 45 mins, the pie still seamed to be quite liquid. I baked for an extra 20 minutes, just to be sure, but the consistency did not change much. I didn't want to risk over-cooking, so I removed the pie and let it cool to room temperature.

This pie is best served chilled with freshly warmed marshmallows. Prepare this pie the night before or very early in the day to alot time for cooling...
Allow the pie to cool thoroughly; then place the pie in the refrigerator for 3 hours or over night.


Despite the hold-ups and a little bit of cheating on the instructions - the pie was incredible. So delicious and so vacant of any processed foods (san marshmallows!). The ingredients DID NOT include sugar except what was in the dates and honey! Another successful Pie of the Week.

The party we attended was pretty fantastic, too! The treats were especially fun:

Potato Brains! Mummy Dogs!Baby Burrito!

Related Posts Plugin for WordPress, Blogger...