SOMETHING I...

CookedMadeFilmedLoveFoundLearnedWrote

PIE OF THE WEEK

Monday, December 27, 2010

I cooked eggnog (the cooking is, apparently, optional).

Re-appropriated glass milk bottles from my two favorite dairies!

At last week's Pasadena Farmers' Market I bought a pallet of eggs from a local guy (not as good as my mother-in-law's friends' eggs, but definitely tastier than any store bought eggs I've tried!). This week, I had not baked enough pies or cookies calling for so many eggs to consume them before our trip out of town to the folks. Another food-oriented dilemma we had was an abundance of milk and half & half in the fridge only days before the journey.

Oh what to do?

MAKE EGGNOG, OBVIOUSLY!

Creative cooking is something we call "Christenson-ing" in our circle of comrades, after our ingeniously creative beer-brewing, recipe-discovering, you-tubing gourmet friends. Instead of planning on discarding our invevibly expiring dairy products, I intended to Christenson some eggnog to take with us on our journey.


I started with this recipe, deemed the "Amazingly Good Eggnog Recipe" which called for cooking the eggs sightly instead of the traditional raw egg yolk ingredient. I made some adjustments having learned a few tricks recently regarding dairy (i.e. light cream can be replaced with half & half and good old fashioned vanilla ice cream can be used for heavy cream) and used mostly half & half instead of milk and cream. Having sampled the awesomeness of this eggnog, I can definitely say that the half & half replacement was successful - particularly for those who add milk to their thick 'n heavy store bought nog like myself - but I can see why the milk is parted into cream portions and milk portions; that is that the two seem to deal with the spices and eggs flavors differently, the milk giving you the smooth start and the cream giving you the lingering sweetness. In any event, here is how I made the recipe which turned out GLORIOUS and absolutely perfect to my taste buds!
(also, I tend to like a little more spice, so you can reduce all the spices by 1/2 a tsp)

(imagine that the palett on the left is FULL of eggs from the Pasadena Farmer's market ;) )

ingredients:
.5 g. of half & half
(or 1 qt milk & 1 qt light
cream)
1.2 c. or sugar
5 whole
cloves
1 tsp of nutmeg
1.5 tsp cinnamon
2 tsp of
vanilla
12 egg COLD
yolks
(*optional: rum)


quick instructions:
1) whisk together the yolks and sugar
2) combine 1 tsp of vanilla, nutmeg, &
half the half&half (or milk) over heat until it boils
3) reduce heat to medium and add the egg yolk mixture slowly
4) stir vigorously for 3 minutes, remove from heat and let cool for 1 hour
5) Finally, add remaining unused ingredients, stir, and refrigerate overnight


extended instructions:
1) Begin by separating the yolks from the egg whites. This is most easily done when the eggs are cold as room temp eggs may have more delicate yolks (you can use the egg whites for whipped topping or meringues later - just
make sure they stay away from ANY moisture).
2) On the lowest setting in a large sauce pan or broad stock pot, combine half of the half & half (or 1 qt of milk) on the stove with the cloves, 1 tsp of vanilla, and the cinnamon for several minutes (5-10 min).
3) Slowly bring to a boil over the course of another 5-10 minutes and let it boil for 5 min. BE VERY CAREFUL NOT TO SCALD!
4) While you are GRADUALLY heating the milk, combine the egg yolks and sugar and whisk thoroughly.
5) Reduce the boiling milk to medium heat and the yolk mixture gradually. Continue to stir it for 3 minutes, keeping it from thickening.
6) Remove from heat and let stand for an hour.
*7) Add the nutmeg, remaining vanilla, the rest of the half & half (or the light cream) stir together.
8) Bottle and let sit overnight. (It can be chilled in freezer and served an hour later, but if you let it sit for at least 6 hours in the fridge, it gets so much more creamy and flavorful!)
9) Serve directly from the refrdigerator!


*1-2 shots of Sailor Jerry's per 12 oz can be added after the chilling stage (1 shot = rummy overtones, 2 shots = grandpa's favorite eggnog) OR
you can add 1-2.5 c of a light rum in the 7th step. I don't like the rum to overwhelm the flavor of the eggnog (which is delicious without it) so I recommend only 1 cup for the whole recipe.

Tuesday, December 21, 2010

I made a biscuit wreath.

I love biscuits and I love wreaths so this was a ridiculously and easy joyful craft for me!

I first saw the idea on A Semi-Homemade Thanksgiving, but after scouring downtown San Luis Obispo for leaf shaped cookie cutters, I settled on some fun shapes that the Sheean household already had at hand.

The only ingredient needed for this quick n' easy, pretty biscuit wreath is Pillsbury/Trader Joe's pre-made grand biscuits.


Wednesday, December 15, 2010

Thursday, December 9, 2010

I made a cuttlefish!


Dear reader,

If you are not Casey Fay, you may read on.
Otherwise, you are going to have to turn back now because the following post is about the incredible Christmas present your girlfriend got you.
If you stumbled upon me because you were Googling yourself and found your name and illustrations on my blog, then you should be totally embarrassed that I caught you!! And that I'm going to tell Ashleyanne of your narcissistic tendencies.

Love,
Danica

P.S. It's ok for you to look at da pie stuff. But nothing else!


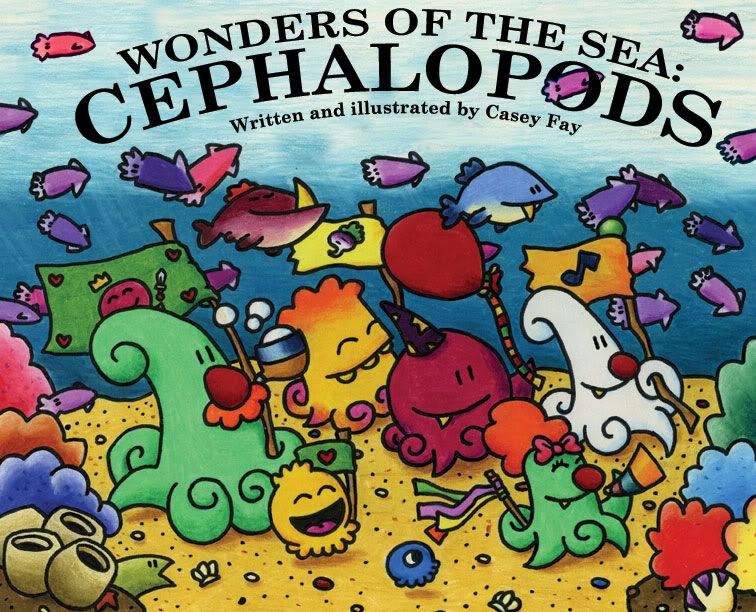
A dear friend from my favorite moments of high school put in a custom order on Etsy with me last month after having shared via facebook our mutual of cephalopods. As it turns out, she - like me -is in cahoots with a super nerdy wonderful illustrator! Casey Fay is the author of the should-be/soon-to-be renowned children's book Wonders of the Sea: Cephalapods (currently sold out - DANG IT) and the illustrator of many awesome quirky, colorful, animal adventure pieces (I want this one so bad!)


For this Christmas, his lovely lady wanted to bestow upon him a gift celebrating his affection for these wonderful invertebrates of the sea. She enlisted my services - seeing as I manifest my own love for cephalopods by crochet hook - with a special request for a brightly colored cuttlefish. I hope my handiwork reflects Mr. Fay's whimsical imagery justly:


Monday, November 22, 2010

Dairy- & Gluten-free Pine Nut Pie

Unbaked pie - bakes into a pretty, marbly surface!

I know that last week I wrote on my Pine Nut Pie recipe and that this week - if anyone was paying attention to the Pie of the Week widget off to the right - I was supposed to write on a made-up recipe for Banana Nutella, but to be honest, my Banana Nutella Pie did not turn out as well as I had hoped whilst my Pine Nut Pie seems to be improving!

This last week I made it for the birthday celebration of Paul Hoppe and then again for the in-laws, some of who cannot eat wheat and/or dairy. I learned some things and made improvements to my recipe, including a version that would not offend the stomachs of my loved ones!

Original ingredients:
Danica's Pine Nute Pie Ingredients
(click here for the original recipe)

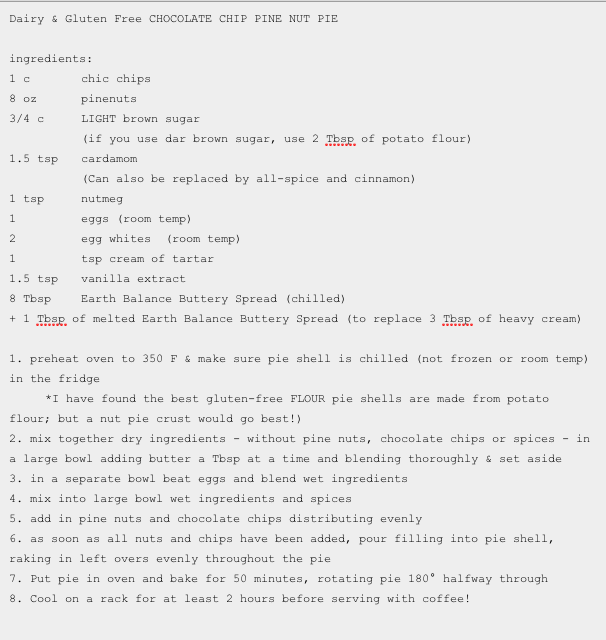
Dairy & Gluten Free CHOCOLATE CHIP PINE NUT PIE  ingredients: 1 c 		chic chips 8 oz		pinenuts 3/4 c 	LIGHT brown sugar 		(if you use dar brown sugar, use 2 Tbsp of potato flour) 1.5 tsp 	cardamom 		(Can also be replaced by all-spice and cinnamon) 1 tsp 	nutmeg 1 		eggs (room temp) 2 		egg whites  (room temp) 1 		tsp cream of tartar 1.5 tsp 	vanilla extract 8 Tbsp	Earth Balance Buttery Spread (chilled) + 1 Tbsp of melted Earth Balance Buttery Spread (to replace 3 Tbsp of heavy cream)  1. preheat oven to 350 F & make sure pie shell is chilled (not frozen or room temp) in the fridge 	*I have found the best gluten-free FLOUR pie shells are made from potato flour; but a nut pie crust would go best!) 2. mix together dry ingredients - without pine nuts, chocolate chips or spices - in a large bowl adding butter a Tbsp at a time and blending thoroughly & set aside 3. in a separate bowl beat eggs and blend wet ingredients  4. mix into large bowl wet ingredients and spices 5. add in pine nuts and chocolate chips distributing evenly 6. as soon as all nuts and chips have been added, pour filling into pie shell, raking in left overs evenly throughout the pie 7. Put pie in oven and bake for 50 minutes, rotating pie 180° halfway through 8. Cool on a rack for at least 2 hours before serving with coffee!

What I learned the second and third time around:
  • Istead of dark brown sugar, light brown sugar! This lends itself to a more fluffy filling and doesn't get quite as dense.
  • The flour is only necessary if you want to use dark brown sugar which mixes into a syrup that is thicker than the light brown sugar.
  • Earth Balance Natural Buttery Spread bakes very well with pies! I hardly noticed the difference between it and regular butter.
  • On a similar note, this spread has a higher viscosity than butter when melted and is similar to the heavy cream - 1 Tbsp of this for the missing consistency of 3 Tbsp of heavy cream
  • The best alternatives for gluten-free pie crusts are not potato flour ones, but cornmeal and nut based! This is Almond Tart Dough is vegan and wheat-free.
  • Trader Joe's new press-in pie crusts are AWESOME. (Not Vegan/Vegetarian/Gluten-free)

Friday, November 19, 2010

I love Mumford & Sons.

For a long time I have been trying to figure out how to post about Mumford & Sons. I didn't want to merely refer to them or provide only a simple sound clip. When Ashley came to visit for a few weeks from Indonesia, she brought with her this wonderful band. Matt and I have been listening to it almost nonstop since making the deliberate decision to patronize the band!

And now, from a friend of my friend's blog, I have found a take-away-show style video of our favorite song:


I know that lines from their music have been posted as facebook statuses for sometime now, and that many a blog has pondered on their religious affiliation. I am by no means a music critic (or any kind of critic, beyond boisterous, opinionated mediterranean-style family exchanges!), but Mumford & Sons does some wonderful things with their lyrics - in conjunction with some wonderful wailings on their stringed instruments - that warrant some meditation. Below are the lyrics to the song above:

How fickle my heart
and how woozy my eyes
I struggle to find
any truth in your lies
And now my heart stumbles
on things I don't know
This weakness I feel
I must finally show

Lend me your hand
and we'll conquer them all
But lend me your heart
and I'll just let you fall
Lend me your eyes
I can change what you see
But your soul you must keep,
totally free

In these bodies we will live,
in these bodies we will die
Where you invest your love,
you invest your life

Awake my soul, awake my soul
You were made to meet your maker

Tuesday, November 16, 2010

Chocolate Chip Pine Nut Pie AND How to Build a Pie (I)

I have been hesitant to try this pie... I know what pinenuts (pignoli s) taste like - and I know I like them - but once again I find myself asking, in a pie? I'd never heard of it except as one of the recipes listed in my Pie book. But this book has since gone over-due and was returned to the library this week, leaving me recipe-less. I did make a copy of the recipe... but heck if I can find it.

So here's the thing, I think I'm pretty clever, this is my 6th pie, I decided to take a gamble and make up the recipe using the experience I've gained, so far. It turned out SO well, I made it twice!

CHOCOLATE CHIP PINE NUT PIE  ingredients: 1 c 		chic chips 8 oz		pinenuts 3/4 c 	dark brown sugar 2 Tbsp 	sugar 1.5 tsp 	cardamom 1 tsp 	nutmeg 3 Tbsp 	heavy whipping cream 1 		eggs (room temp) 2 		egg whites  (room temp) 1 		tsp cream of tartar 1.5 tsp 	vanilla extract 8 Tbsp	butter (room temp)  1. preheat oven to 350 F & make sure pie shell is chilled (not frozen or room temp) in the fridge 2. mix together dry ingredients - without pine nuts, chocolate chips or spices - in a large bowl adding butter a Tbsp at a time and blending thoroughly & set aside 3. in a separate bowl beat eggs and blend wet ingredients  4. mix into large bowl wet ingredients and spices 5. add in pine nuts and chocolate chips distributing evenly 6. as soon as all nuts and chips have been added, pour filling into pie shell, raking in left overs evenly throughout the pie 7. Put pie in oven and bake for 50 minutes, rotating pie 180° halfway through 8. Cool on a rack for at least 2 hours before serving with coffee!

I started by picking out my filling and measuring out the basic ingredients to get an idea of much would make the desired amount of filling. I then went on to experiment with to iterations of the pine nut pie! Below is what I learned based on a little research and experience - but please feel free to contribute or correct me if I'm wrong.

MAIN INGREDIENT:
With pies utilizing squash and fruit as the primary filling, it seemed between 1 1/2 - 2 cups of the primary ingredient is needed, then pureed or mixed with other things. I had to determine whether or not to blend the pignolis/pinenuts with something else or treat them like the "fruit" - since pine nuts are so soft, even when toasted, despite their strong flavor, I decided they were fine as the main ingredient rather than the main flavor within some other base (i.e. ginger flavor in the custard pie). I had an 8 oz bag of pinenuts which measured closely to 1 1/2 cups. I toasted them on a cookie sheet in the broiler on low for about 6 minutes and then watched to they reached the right "brown-ness".

To turn the nuts into a cream filling, I then considered which dry and wet ingredients to use.

WET INGREDIENTS:
I have basically only used two kinds of liquid in most of my pies: cream and eggs. I love cream, I will use it whenever I can. I am also a proponent for using it and whole milk rather than "low fat" alternatives and a quarter cup of heavy or light cream can go a long way to create thick, but fluid wet ingredient base. Egg thickens when cooked and mixes well at room temperature; but whole eggs can get quite dense, so consider using just egg whites or a mixture of the two (I used whites in the first iteration of the pie and just whole eggs in the second - it was too dense with the 2 yolks).
Other wet ingredients to consider: For many fruits, the addition of lemon is warranted; for many squash/winter pies, the addition of honey or molasses; and for yet many other kinds of pies and their saucy garnishes, corn syrup (but I'll let you in on a hint, most of the time you don't need it, BUT if you don't use it you will need to replace it with something of similar viscosity - like honey or an amount of water with boiled sugar).

DRY INGREDIENTS:
Most of my favorite pies use between 1/2 to 1 1/2 cups of brown sugar to enhance the fruit; in the case of the cream-based pies, similar amounts of white sugar are used BUT often times if you've got good hardy filling (like several cups of a fruit or squash) you really don't need more than 1/2 a cup of sugar. You can also replace it with things like honey or chocolate chips - instead of an extra half a cup of sugar in the pine nut pie, I added chocolate chips!
Two tablespoons of flour goes a long way with giving your pie some density, but if you are trying to create a filling that is not so fruity and not so custardy - like a peanut butter filling - you are going to need closer to a cup of flour. You will also want to consider how you would lighten a dense, flour-based filling. I often use a teaspoon or two of cream of tartar (NOT to be confused with tartar sauce... which I once sent my husband to the store to get in a last minute pie baking frenzy...) - it has a similar effect as baking soda, especially in addition to egg whites.

BUTTER:
I don't know if this belongs with wet or dry because it ought always to be added at room temperature which makes it sweat a bit. Generally you need 1/4 - 1/2 a cup in any given recipe (not including the crust) unless you venture away from the fruity/squashy/savory fillings, which call for more, and lean toward the sugary/custardy/creamy/sweet fillings, which call for less.


SPICES:
My favorites in pie: nutmeg, ginger, and, lately, cardamom! You usually don't need more than a teaspoon of any given spice, but I tend to like my baked goods robust so I generally add an extra dash or two. These are some other good pastry spices I selected from descriptions at realsimple.com:

Cinnamon, ground. Use this warm, aromatic spice for holiday baking, as well as stews and curries.
Cloves, ground. A staple in holiday baking, especially gingersnaps.
Ginger, ground. Ground ginger has a more intense and astringent taste than fresh and is often more convenient. Ginger’s popularity has increased in the U.S. because of its supposed benefits to the digestive system.
Nutmeg, whole. Nutmeg's sweet, spicy flavor is great in savory and sweet dishes alike.
Allspice, whole. Tasting like a combination of cinnamon, nutmeg, and cloves, this aromatic spice will complement both sweet and savory meals (particularly jerk dishes).
Chinese five-spice powder. Comprised of cinnamon, cloves, fennel, star anise, and Szechuan pepper, this powder is a staple in Chinese fare.
Star anise. A Chinese spice, star anise resembles a star shape. Ground, it’s the main ingredient in Chinese five-spice powder.
Vanilla beans. Beans should be dark, smooth (not dry), and plump. Store in an airtight container in the freezer for up to a year and a half.
Cardamom, ground. Use in Indian dishes and some baked goods. It should look dark gray.
Caraway seeds. Give breads and cakes an earthy, nutty flavor.


Wednesday, November 10, 2010

I learned to make Japanese water balloons!

A few weeks ago, Ashley put up a series of lovely blog posts what engendered great feelings of whimsy in me. One of the things she mentioned was sending a birthday package to a friend (I would venture to guess it went to mutual friend currently featured in Ashley's blog) that had a bag, with instructions, full of folded origami balloons. I decided I must learn this for myself! And then put these little balloons in an emergency party kit a long with some other goodies (mentioned below) - you can, too! With these step by step photos, I did my darnedest to depict how pictorial instructions for you (mouse over the image for step instructions):


At the same time as discovering Ashley's balloons, Hollin visited and photographed the 6th Annual Puces Pop DIY Craft & Fair where equal amounts of celebratory decor dotted the church's basement and merchandising displays of crafters' booths. A particularly lovely and simple decoration Hollin captured were the pom-poms strung up above the entrance:


Apparently, though, you can purchase something similar for $65 from anthropologie (while these pom-poms are felted, they do NOT make this project worth that hunk of change in my humble opinion):


I finally got myself to Michael's where I was able to purchase a HUGE bag of brightly colored pom-poms for $5 and string them together myself with some magenta embroidery floss - it was very therapeutic:


(Yes. Our hallway is pink.)
Related Posts Plugin for WordPress, Blogger...